
Billing Medicaid might sound intimidating at first, but it doesn’t have to be. There are forms, codes, eligibility rules, and state-specific requirements—it’s a lot to juggle.
But once you understand the process, it becomes much more manageable. Think of it like driving: the first few times you get behind the wheel, it doesn’t feel very easy, but after enough practice, the steps become second nature.
This guide will walk you through Medicaid billing step by step. Whether you’re brand new to Medicaid or you’ve been submitting claims but still run into denials, these instructions will help you build a smoother workflow, avoid common mistakes, and get paid faster.
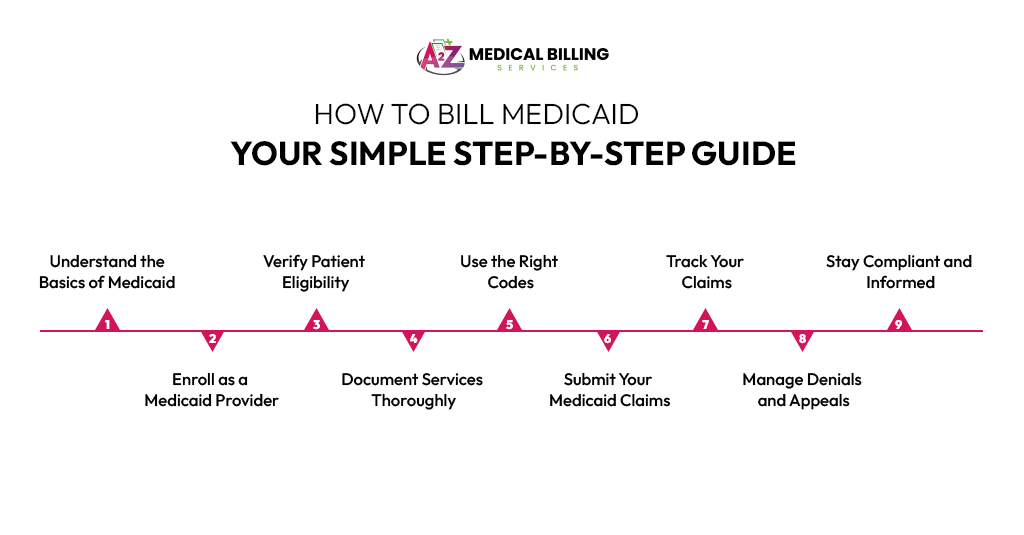
Step 1: Understand the Basics of Medicaid
Let’s start with the foundation—understanding what Medicaid actually is. If you’re new to billing, don’t stress. Medicaid is a joint federal and state program that helps provide health coverage to low-income individuals and families. While the federal government sets broad rules, each state runs its own version with slightly different guidelines. That means you’ll need to be familiar with your specific state’s Medicaid system. Once you grasp the basics, the rest of the billing process will feel a lot more manageable.
Before billing, it’s important to understand what Medicaid is and how it works.
Medicaid is a state and federally funded health insurance program for low-income individuals and families. It helps cover medical services like doctor visits, prescriptions, hospital stays, and more.
Medicaid is different in every state. While federal guidelines set the foundation, your state runs its own program with its own rules, fee schedules, and paperwork.
Pro tip: Always check your specific state’s Medicaid website for local policies and billing procedures.
Step 2: Enroll as a Medicaid Provider
Before you can send out your first Medicaid claim, you need to be officially enrolled as a provider. Think of it as getting your practice “on the books” with your state’s Medicaid system. If you skip this step, Medicaid won’t pay you—no matter how accurate your claim is. The enrollment process typically happens online through your state’s Medicaid website. You’ll need your NPI, tax ID, medical license, DEA registration, and a few other documents. It may take a few weeks to process, so apply as soon as possible and keep copies of everything you submit.
You must be enrolled before you can send claims and get paid.
Visit Your State Medicaid Website
Each state has a portal where providers can apply. For example, in Texas, you’ll go to TMHP.com.
Fill Out the Application
You’ll need:
· Your NPI (National Provider Identifier)
· Tax ID or EIN
· Medical license
· DEA registration (if prescribing medication)
Submit Supporting Documents
Upload scanned copies of your credentials. Make sure everything is current.
Wait for Approval
This process can take a few weeks. Be patient, but follow up if it takes too long.
Transition Tip: Once you receive your Medicaid provider number, you’re ready to start billing!
Step 3: Verify Patient Eligibility
Just because a patient says they have Medicaid doesn’t always mean their coverage is active that day. That’s why verifying eligibility before each visit is a must. It’s a quick step that can save you a significant amount of time and frustration down the line. Ask for the patient’s Medicaid ID card and confirm their active status using your state’s online provider portal. One missed eligibility check could mean an automatic claim denial—so make this a routine part of your front-desk workflow. Before every visit, confirm that Medicaid covers the patient at the time of service.
Ask for the Medicaid Card
Patients should bring their card or provide their member ID.
Check Online Eligibility
Use your state’s Medicaid portal to verify:
· Active coverage
· Managed care plan (if applicable)
· Service limitations
Why this is critical: Billing for a patient who isn’t eligible on the date of service is one of the top reasons claims get denied.
Step 4: Document Services Thoroughly
Solid documentation is your best defense when billing Medicaid. Think of your patient notes as the official record of what happened and why it mattered. Be as clear and detailed as possible—what symptoms the patient reported, what you diagnosed, and what treatment you provided. If Medicaid reviews your claim, they’ll want to see that the service was medically necessary and properly documented. In short, if it’s not written down, it didn’t happen—at least from a billing standpoint. Good documentation protects you and ensures payment.
Write Clear Notes
Describe what was done, why, and the medical necessity.
· Patient complaints
· Diagnosis
· Procedures or treatments
· Time spent (if relevant to billing)
· Attach Supporting Info
· Include lab results, referrals, or imaging if needed.
Important: Medicaid often audits documentation, especially for high-cost services.
Step 5: Use the Right Codes
Now it’s time to speak Medicaid’s language—coding—every service you provide and every diagnosis you make must be matched to the correct codes. Use CPT codes for the procedures or visits you performed, and ICD-10 codes for the diagnoses. For example, a routine checkup might use CPT code 99213, and a diagnosis of the common cold could be ICD-10 code J00. Don’t worry—you don’t need to memorize them all. Coding software and reference tools can help you choose the right ones and avoid costly errors.
Coding accurately is key to receiving prompt and accurate payment.
Use CPT/HCPCS Codes for Services
These describe what service you performed.
Example: 99213 for a standard office visit.
Use ICD-10 Codes for Diagnosis
These describe why the service was needed.
Example: J20.9 for acute bronchitis.
· Avoid Common Mistakes
· Wrong or outdated codes
· Missing modifiers
· Conflicting diagnosis and procedure codes
Tip: Use billing software or coding tools to reduce errors.
Step 6: Submit Your Medicaid Claims
With everything documented and coded, it’s time to actually submit your claim. Most states strongly prefer electronic submission—it’s faster, safer, and easier to track. You can submit directly through Medicaid’s system or through a clearinghouse like Availity or Office Ally. Make sure all the details are correct before sending—things like patient information, dates of service, and provider numbers. A small typo in a member ID or date can delay payment or cause a rejection, so take a few extra minutes to review.
Now it’s time to send the claim to Medicaid.
Choose Your Submission Method
· Electronically (Preferred): Use clearinghouses like Availity, Office Ally, or your EHR system.
· Paper Claims: Only use if electronic isn’t available. Use the CMS-1500 form and send it to your state’s Medicaid billing office.
Double-Check Before Sending
· Patient info
· Dates of service
· Provider number
· Codes and modifiers
Tip: Even a single digit off in the member ID can cause denial. Always review!
Step 7: Track Your Claims
Just because you sent the claim doesn’t mean your work is done. Medicaid claims can be delayed, lost, or denied—especially if there’s a small error. That’s why following up is just as important as submitting. Use your state’s Medicaid portal to track the status of claims. Set a routine—maybe once a week—to check on unpaid claims and make calls if anything looks off. Staying organized here can mean faster payments and fewer surprises down the road. Don’t just “submit and forget.”
Use the State’s Provider Portal
Log in to check the status of submitted claims.
Set Up Alerts
Most portals notify you if claims are denied or need correction.
Follow Up
If a claim is delayed beyond 30 days, contact the Medicaid provider support line.
Organization tip: Keep a spreadsheet or use software to log:
· Submission dates
· Amounts billed
· Payment received
· Denials or appeals
Step 8: Manage Denials and Appeals
Denials are frustrating, but they’re a normal part of the process. The key is not to panic. Instead, find out why the claim was denied—was it the wrong code? Missing information? Eligibility issue? Once you understand the reason, fix the error and resubmit the claim. If you believe the denial was incorrect, you can file an appeal following your state’s guidelines. Be mindful of deadlines, though—appeals often have a strict window for submission. The faster you act, the better your chances of success.
Yes, denials happen—but they’re fixable.
Common Reasons for Denial
· Invalid patient eligibility
· Incorrect or missing codes
· Lack of medical necessity
Fix a Denied Claim
· Read the denial code or message.
· Correct the issue (code, documentation, or eligibility).
· Resubmit within the allowed timeframe.
Appeals Process
If you believe the denial was incorrect, file a formal appeal. Each state has its own process and deadlines.
Important: Keep copies of all denial letters and resubmissions.
Step 9: Stay Compliant and Informed
Finally, Medicaid rules aren’t set in stone—they change often. That’s why staying updated is essential. Make sure you and your billing staff are trained on the latest policies, coding changes, and compliance rules. Many states offer free webinars, email updates, and newsletters—take advantage of those. Also, do periodic internal audits to catch small issues before they become big problems. A proactive approach keeps your practice compliant, efficient, and financially healthy. Medicaid billing rules change frequently.
Train Your Team
Make sure your front desk, billing staff, and coders are updated regularly.
Audit Internally
Review a few claims each month for errors or trends.
Attend State Training
Most Medicaid programs offer free webinars and newsletters.
Conclusion
Billing Medicaid isn’t simple, but it also doesn’t have to be a nightmare. Once you understand your state’s rules, enroll properly, verify every patient, document thoroughly, code accurately, and track claims, you’ll avoid most of the headaches that lead to denials.
The secret to success is consistency. Make eligibility checks part of your routine. Document everything, as it might be audited. Double-check codes before submitting. And never stop learning—because Medicaid rules will always keep changing.
Billing Medicaid takes some work upfront—but it becomes second nature with practice. To summarize:
· Enroll correctly
· Verify every patient
· Document clearly
· Code accurately
· Track everything
· Handle denials promptly
· Stay compliant
By following these steps and tips, your practice can reduce denials, speed up payments, and stay focused on patient care.